
Remove the front cover, stop the piston at the bottom of its stroke, relieve pressure and unplug. Take off the suction set and foot valve, drop the pump block and slide the piston rod out. Fit the new upper packing with its lip and O-ring down and the lower packing with its bevel up, grease the piston guide tool, tap the rod home with a rubber mallet, reassemble and check for leaks.
- Signs Your Impact 440 or 640 Needs New Packings
- Parts and Tools for the Impact 440 and 640 Repack
- Before You Open the Fluid Section: Pressure Relief and Safety
- Repacking the Impact 440 and 640 Fluid Section: Step by Step
- Test the Repair Before You Spray
- Mistakes That Cause a Second Repack
- Order the Right Impact 440 and 640 Repacking Parts
Paint weeping from the top of the pump, or a sprayer that will not hold pressure even with a fresh tip, is what usually sends an Impact owner looking for a repacking kit. The steps below follow Titan's Impact 640 service manual; the Impact 440 owner's manual uses the same steps, tools and kit number. Keep your own manual open beside this page, and where your sprayer differs, your manual wins.
Signs Your Impact 440 or 640 Needs New Packings
Symptoms that point to worn packings
- Paint at the upper end of the fluid section. Titan's troubleshooting chart blames a worn upper packing or a worn piston rod.
- Pressure that will not build or hold once tip, filters and suction set are ruled out. Worn or dirty packings are one internal leak path; worn valve balls and seats are the others.
- Solid yellow on an Impact 440's pressure light with a new tip at maximum pressure. The 440 manual reads that as fluid section wear.
- Wear or scoring on the piston rod once it is out. A worn rod leaks by itself and ruins new packings.
Rule out the cheaper causes first
Titan's chart lists cheaper causes of low pressure: a worn or oversized tip, the pressure knob setting, a clogged pump filter, gun filter or inlet screen, an air leak at the siphon tube, and paint leaving the return hose in SPRAY (a PrimeSpray valve job). Both valve seats can be reached without a full teardown, so check the outlet valve ball and seat and the inlet valve before packings. Our Impact 640 packings, piston and valves article sorts symptoms part by part.
Parts and Tools for the Impact 440 and 640 Repack
Genuine OEM repack parts for the 440 and 640
Tools and supplies
- 3/8" hex wrench for the two pump block mounting screws, and a wrench for the foot valve housing and retainer nut.
- 5/16" hex wrench, only if the outlet valve retainer comes off the rod.
- Rubber mallet and the piston guide tool from the repacking kit, plus grease.
- PTFE tape for the siphon tube threads on High Rider cart units.
- Protective eyewear, which Titan says to wear whenever you service the sprayer.
Before You Open the Fluid Section: Pressure Relief and Safety
Switching the motor off does not release the pressure in the hose and pump. Before any service, lock the gun, switch the sprayer OFF, turn the pressure knob counterclockwise to OFF in the black zone, release the trigger lock, hold the gun's metal part firmly against a metal container to ground it, trigger to empty the hose, lock the gun again and move the PRIME/SPRAY valve down to PRIME. Then unplug the cord. Our Impact pressure relief and injection safety basics explain why each step matters.
Repacking the Impact 440 and 640 Fluid Section: Step by Step
Step 1: Remove the front cover, then relieve pressure and unplug
Take out the four front cover screws and lift the cover off. Stop the sprayer with the piston at the very bottom of its stroke, then run the Pressure Relief Procedure and unplug the cord.
Step 2: Remove the suction set and foot valve
Unscrew the return hose from the pump block, pull the retaining clip from the bottom of the foot valve housing, take the siphon assembly away and tilt the sprayer back. Remove the pusher stem clip, slide the pusher stem housing off, then wrench the foot valve housing out of the pump block. The outlet valve can stay on the rod.
Step 3: Take out the piston rod
Back out the two pump block mounting screws with a 3/8" hex wrench. Lower the block about 1/2" from the pump housing, slide block and rod forward until the top of the rod clears the T-slot on the slider assembly, then pass the rod out through the bottom of the block.
Step 4: Replace the upper and lower packings
Unscrew the retainer nut, lift out the piston guide and pull both packings. Clean the pump block, then seat the new upper packing with its raised lip and O-ring facing down and the new lower packing with its beveled edge facing up. Inspect the rod and replace it if worn.
Step 5: Refit the piston rod with the guide tool
If the outlet valve was removed, thread it back into the rod and tighten the retainer. Drop the piston guide into the retainer nut and run the nut in hand tight. Grease the guide tool and rod, slide the tool over the top of the rod, feed the rod up through the bottom of the block, tap its lower end lightly with a rubber mallet until it seats, then tighten the retainer nut securely.
Step 6: Reassemble and tighten the housing
Slide the top of the rod back into the T-slot. Lift the pump block until it rests against the pump housing, tighten both mounting screws securely, then thread the foot valve assembly back into the block.
Step 7: Reconnect the suction set and prime
High Rider cart units: tape the siphon tube threads with PTFE tape, screw the tube into the foot valve and clip the return hose to it. Skid and Low Rider units: push the siphon elbow into the foot valve housing, slide the retaining clip up into its groove and screw the return hose into the block. Refit the front cover, start the sprayer as the Operation section describes and look for leaks.
Test the Repair Before You Spray
Check for leaks at the top and bottom of the pump
Prime with solvent first: siphon tube in water for latex or mineral spirits for oil-based paint, return hose in a metal waste container, pressure at MIN, valve down to PRIME, then switch on. Move the valve up to SPRAY and trigger the grounded gun (no tip fitted) into the waste container until fresh solvent runs, then lock the gun, raise the pressure slowly and inspect the pump. Watch the top of the fluid section and every joint you disturbed. If anything weeps, relieve pressure before you tighten a fitting.
Confirm pressure and spray pattern
On the Impact 440, solid green on the pressure indicator means 1901 to 3300 PSI, the range for latex and oil-based house paint; solid yellow with a new tip at maximum means the fluid section still needs attention. Fit the tip guard and tip, spray cardboard, and settle on the lowest pressure that fully atomizes. On a 640, use the checks in its own manual. If the fault remains, Titan's service notes say to go back over the procedure.
Mistakes That Cause a Second Repack
- Packings fitted upside down. Upper: raised lip and O-ring down. Lower: beveled edge up.
- A wrench on the piston. Titan warns this can damage the piston and cause leakage.
- Feeding the rod in dry. Grease the guide tool and rod, and use only light mallet taps.
- Reusing a worn piston rod. A worn rod causes top-end leaks by itself.
- Mixing old and new kit parts. Titan says the best results come from using every part in the kit.
- Running the pump dry. The Impact 440 manual warns that more than ten seconds without fluid wears the packings. On a 440, also fill the oiler with Piston Lube and press the oiler button 2-5 times.
Order the Right Impact 440 and 640 Repacking Parts
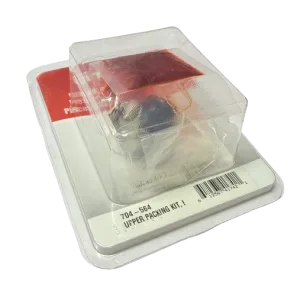
The Impact 440 fluid section page lists the 704-586B repacking kit beside the 704-551A piston rod; the Impact 640 fluid section page also breaks out the 704-564 upper packing kit and 0532915 lower packing. Our Impact repacking and valve kit guide and the repacking kits category match kits to other models, and all repair guides covers more jobs on this pump.
Repack parts and lubricant for the Impact 440 and 640:
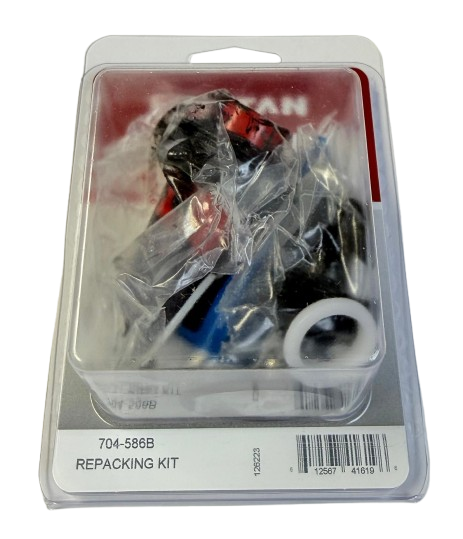

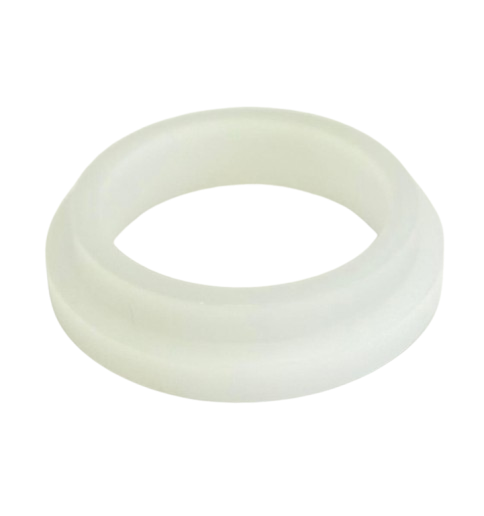

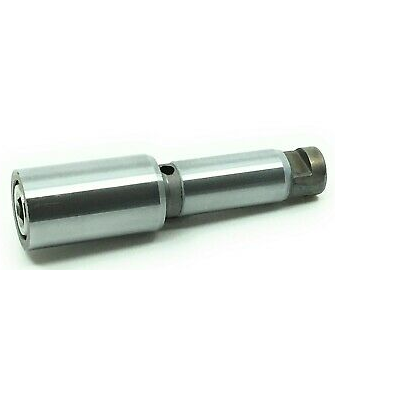
Repacking kit, piston rod, piston guide, valves and pump block for the 440.
Upper packing kit, lower packing, rod and valve parts for the 640.
A different cylinder and piston rod: use this page if you own the X model.
Need Help Matching an Impact Repack Kit?
Call with your Impact model and serial number and we will check the kit and packing numbers against the diagram before you order.
(713) 931-0006Order by Parts Diagram