



Titan EP2300 Final Assembly Parts
Shop Titan EP2300 Final Assembly Parts for maintenance, restoration and repair of the complete sprayer assembly. Use the EP2300 exploded parts diagram to identify controls, fittings, hoses, mounting components, brackets, fasteners, electrical connections and other diagram-listed parts by exact callout and replacement part number.
Find Titan EP2300 Final Assembly Replacement Parts
The EP2300 Final Assembly diagram brings together components used in the completed sprayer configuration. It is especially useful when the part requiring service is mounted on the finished machine rather than located entirely within a dedicated subassembly such as the piston pump.
Use the Final Assembly illustration to identify the location and relationship of controls, fittings, hoses, brackets, mounting hardware and other diagram-listed components. Always verify the numbered callout, replacement part number, description and required quantity before ordering.
How to Find the Correct EP2300 Final Assembly Part
Confirm EP2300
Verify that the sprayer being serviced is the EP2300 before selecting replacement components from the Final Assembly diagram.
Open the Final Assembly Diagram
Locate the area of the complete sprayer where the damaged, worn or missing component is installed.
Match the Callout
Find the numbered callout attached to the component and match it with the corresponding entry in the parts list.
Verify Part & Quantity
Confirm the exact replacement part number, description and quantity required for the EP2300 configuration being repaired.
What the EP2300 Final Assembly Diagram Covers
A final assembly illustration is useful for understanding how individual sprayer components are positioned and connected on the completed machine. It can also help direct a repair toward the correct detailed subassembly when the affected component belongs to another service section.
Mounted Components
Use the diagram to identify applicable components and understand where they are installed on the completed EP2300 sprayer.
Hoses & Fittings
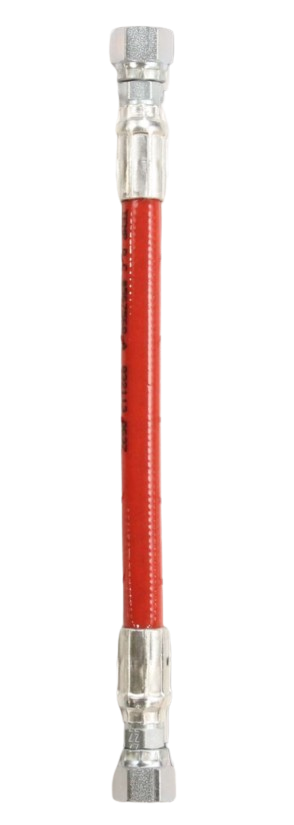
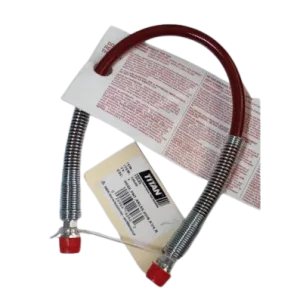
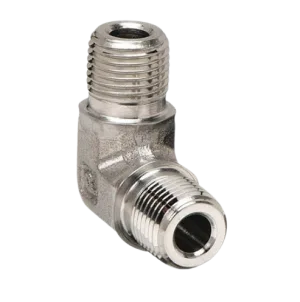
Identify diagram-listed hoses, fittings and connection components used to connect applicable sections of the sprayer.
Brackets & Mounting Parts
Brackets, supports and mounting components help secure applicable sprayer parts in their intended positions.
Fasteners & Hardware
Diagram-listed bolts, screws, washers, nuts, clips and retainers secure components throughout the final sprayer assembly.
EP2300 Final Assembly Components to Inspect
Inspect applicable external controls and their mounting or connection components for damage, looseness or missing hardware.
Inspect diagram-listed hoses, fittings and connections for damage, leakage, contamination or compromised connection points.
Check mounting brackets and supports for bending, cracks, looseness or damaged attachment points.
Inspect accessible diagram-listed connectors and wiring for visible damage, looseness or improper routing before further diagnosis.
Verify that applicable screws, bolts, washers, nuts, clips and retainers are present and correctly positioned.
If the required component belongs to a detailed pump, control, drive or other service assembly, use that assembly's exploded diagram for final part identification.
Start With the Final Assembly, Then Follow the System
The Final Assembly diagram is a useful starting point when you know where a component is located on the machine but are not certain which detailed assembly contains it. Once the affected area is identified, inspect the connected system before ordering parts.
1. Locate the Component
Find the damaged, worn or missing component on the completed EP2300 Final Assembly illustration.
2. Identify Its System
Determine whether the component belongs to the fluid, pump, control, drive, mounting or another machine system.
3. Inspect Connected Parts
Check nearby fittings, hoses, connectors, brackets and hardware for related wear or damage.
4. Verify the Replacement
Match the diagram callout with the parts list and confirm the exact part number and quantity before ordering.
Common EP2300 Final Assembly Inspection Areas
A symptom visible on the complete machine does not always identify the component responsible. Inspect the affected area and its related system before choosing replacement parts.
| Symptom | What to Inspect | Repair Direction |
|---|---|---|
| Loose or Damaged Component | Inspect brackets, mounting points, fasteners, retainers and the component itself. | Identify the exact diagram callout and inspect surrounding mounting components for related damage. |
| Visible Fluid Leakage | After proper pressure relief, inspect the visible leak area, fittings, hoses, connections and related fluid-system components. | Trace the leak to its actual source before replacing a fitting, hose, seal or connected assembly. |
| Sprayer Will Not Operate Normally | Inspect applicable power, control, pressure-sensing, drive and fluid-system components according to the observed symptom. | Use the Final Assembly to locate the affected area, then continue diagnosis with the relevant detailed assembly diagram. |
| Excessive Movement or Vibration | Inspect mounting brackets, supports, fasteners, drive components and structural attachment points. | Correct confirmed loose, damaged or worn components before returning the sprayer to service. |
| Damaged Connector or Wiring | Inspect accessible wiring, connectors, routing points and associated control components for visible damage. | Identify the exact diagram-listed component and follow the applicable service information for electrical diagnosis. |
EP2300 Final Assembly or Piston Pump Parts?
EP2300 Final Assembly Parts
Start here when identifying components by their location on the completed sprayer, including applicable controls, fittings, hoses, brackets, mounting components and hardware.
EP2300 Piston Pump Parts
Use the piston-pump section for pump internals such as piston components, packings, inlet and outlet valve parts, seals and related pump components.
View EP2300 Piston Pump Parts →Verify EP2300 Final Assembly Part Compatibility
Do not select a control, fitting, hose, bracket, connector, fastener or other component based only on appearance. Similar parts used on other Titan EP, EPSE or EPX sprayers can differ in dimensions, connections, mounting arrangements or application.
Confirm the EP2300 model, applicable Final Assembly diagram, numbered callout, component description, required quantity and exact replacement part number before ordering.
Before Buying Titan EP2300 Final Assembly Parts
Verify the exact sprayer model before selecting replacement components.
Find the affected component on the complete Final Assembly exploded illustration.
Check nearby fittings, brackets, connections, hardware and related system components for additional wear or damage.
Match the numbered diagram callout with the corresponding entry in the EP2300 parts list.
Confirm the exact replacement part number, description and required quantity before ordering.
Shop Titan EP2300 Parts by Assembly
Use the Final Assembly page to identify where a component is located on the complete EP2300. For internal pump repairs, continue to the dedicated Piston Pump section for more detailed component identification.
Prepare the EP2300 Safely Before Servicing Final Assembly Parts
Shut down the sprayer and disconnect or isolate the applicable power source before service. Follow the manufacturer's complete pressure-relief procedure before loosening a hose, fitting, valve, pump component or other part of the pressurized fluid system. Never service pressurized equipment. Follow the applicable EP2300 operating and service instructions during inspection, disassembly, replacement, reassembly and testing.
Shop Titan EP2300 Final Assembly Parts
Use the EP2300 Final Assembly exploded diagram to locate the component you need, match its numbered callout to the parts list and verify the exact replacement part number and quantity before ordering.
Shop EP2300 Final Assembly PartsTitan EP2300 Final Assembly Parts FAQ
What is the Titan EP2300 Final Assembly diagram used for?
The Final Assembly diagram helps identify components by their location on the completed EP2300 sprayer and shows how applicable components are positioned or connected within the machine.
How do I find the correct EP2300 Final Assembly part?
Locate the component in the EP2300 Final Assembly exploded diagram, identify its numbered callout and match that callout with the exact replacement part number, description and quantity in the parts list.
Where should I look for EP2300 internal piston pump parts?
Use the dedicated EP2300 Piston Pump section for piston components, packings, inlet and outlet valve parts, seals and other internal pump components.
Should I inspect nearby components when replacing an EP2300 part?
Yes. Inspect nearby mounting hardware, brackets, fittings, hoses, connectors and other related components when damage or wear is found in one area of the sprayer.
Are EP2300 and EP2300SE parts interchangeable?
Do not assume interchangeability based on similar model names. Compare the applicable diagrams and exact replacement part numbers for the model being serviced before ordering.
Can I identify an EP2300 replacement part by appearance?
Appearance alone is not a reliable fitment method. Similar components may have different dimensions, threads, connections or applications. Use the exploded diagram and exact replacement part number.
What should I verify before ordering EP2300 Final Assembly parts?
Confirm the EP2300 model, correct Final Assembly diagram, numbered callout, component description, exact replacement part number and required quantity before ordering.
Need Help Finding a Titan EP2300 Part?
Have your EP2300 model information, serial number when available, existing part number and exploded-diagram callout ready to help identify the correct final assembly component or determine which detailed assembly diagram should be used for your repair.
Parts & Fitment Help: 713-931-0006