
Relieve pressure as section 4.6 of the operation manual describes. Unscrew the inlet valve pusher (17 mm) and renew its wiper and O-ring. Break the inlet housing loose with a 30 mm wrench and light hammer taps, remove the clasp and inlet valve, clean the seat and seals, then refit with both black seals to about 90 Nm. Remove the outlet valve with a 22 mm wrench, clean or replace its parts and torque it to 60 Nm.
- Signs the PowrLiner 3500 Pump Needs Work
- Pump Parts and Tools
- Pressure Relief and Engine Shut-Down Before Replacing the PowrLiner 3500 Valves
- Servicing the PowrLiner 3500 Pump: Step by Step
- Test the PowrLiner 3500 After Replacing the Valves
- Mistakes to Avoid When Replacing the PowrLiner 3500 Valves
- Order the PowrLiner 3500 Pump Parts
Titan's PowrLiner 3500 repair manual, the booklet with the repair section and spare parts lists, covers three jobs you can do yourself: the inlet valve pusher, the inlet valve and the outlet valve. A fourth item, the pressure control valve, it keeps for an Authorized Titan Service Center. The manual also notes that abrasive paints wear these parts even though they are made from high-quality materials, and its wear-part list names two of them: the inlet valve, spare part 2393043, and the outlet valve, 2413371. The same manual includes parts lists for both the PL3500 and PL3500S main assemblies, and our pump, inlet valve body and outlet valve diagrams are shared by the two models.
Signs the PowrLiner 3500 Pump Needs Work
Symptoms that point to the pump
- Performance loss, or poor or no suction. This is how Titan's wear-part list says a failing inlet valve shows itself.
- Pulsing, falling pressure or trouble priming. As a general rule for airless pumps, worn valve seats and balls cause these. The repair manual gives no separate symptom for the outlet valve, so inspect both valves while the tools are out.
Rule out the filter and tip first
Pulling valves takes longer than checking the cheap parts, and the cheap parts cause the same complaints. A partly blocked filter causes pressure loss, pulsing and spitting, so clean the siphon screen, the high-pressure filter and the gun filter first. A worn tip has a wider orifice: pressure falls and the line turns coarse or streaky, and a new tip settles that question in minutes. Our PowrLiner 3500 maintenance guide covers the filters and flushing routine. If the 3500 carries one of the RX-80 guns listed on its accessories page and the gun spits when you release the trigger, the fault is in the gun, covered in our RX-80 seal assembly guide.
Pump Parts and Tools
Inlet valve body and outlet valve parts
Tools and supplies
- 17 mm wrench for the inlet valve pusher
- 30 mm wrench for the inlet housing and the inlet valve
- A hammer for light taps on the end of the 30 mm wrench
- A screwdriver for the clasps on both valves
- 22 mm wrench for the outlet valve
- A cleaning agent and brush for the inlet valve seat, and a torque wrench for the outlet valve housing's 60 Nm
Pressure Relief and Engine Shut-Down Before Replacing the PowrLiner 3500 Valves
The repair manual opens with one instruction before any repair: perform the Pressure Relief Procedure in section 4.6 of the PowrLiner 3500 operation manual. That procedure is not reprinted in the repair manual, so keep the operation manual open; both are on our manuals page. The rules around it are spelled out: release the pressure from the gun and hose, secure the gun with its trigger lock and switch the unit off. Turning the engine off does not release the pressure by itself; the PRIME/SPRAY valve or pressure bleed valve has to be in the right position. Our pressure relief article covers the reasons.
Servicing the PowrLiner 3500 Pump: Step by Step
Step 1: Relieve pressure and stop the engine
Follow section 4.6 of the operation manual, lock the gun and switch the unit off. Do not count on the engine switch alone to release pressure.
Step 2: Service the inlet valve pusher
Screw the inlet valve pusher out with a 17 mm wrench and replace its wiper and O-ring.
Step 3: Remove the inlet valve housing
Set a 30 mm wrench on the housing and break it loose with light hammer blows on the end of the wrench. Unscrew the housing, with the inlet valve still inside it, from the paint section.
Step 4: Service the inlet valve body
Lever the clasp out with a screwdriver, put the 30 mm wrench on the inlet valve and turn it out carefully. Clean the valve seat with a cleaning agent and brush, leaving no bristles behind, then clean both seals and check them for damage. Replace the seals if needed, and replace the inlet valve if any valve part shows visible wear.
Step 5: Refit the inlet valve
Push the inlet valve into the housing and lock it with the clasp, with the black seal in place in the housing (the manual's installation text calls it the trigger housing). Put the same black seal down inside the paint section, screw the assembly in, and tighten it with the 30 mm wrench plus three light hammer blows on the wrench end, which Titan equates to roughly 90 Nm.
Step 6: Service the outlet valve
Unscrew the outlet valve from the paint section with a 22 mm wrench. Ease the clasp out with a screwdriver; the compression spring pushes the ball and the valve seat out. Clean or replace those parts and check the O-ring for damage.
Step 7: Reassemble the outlet valve
Check the installation position of the spring support ring (it clips onto the spring), the outlet valve seat and the seal against the manual's figure before you close it up. Torque the outlet valve housing to 60 Nm.
Test the PowrLiner 3500 After Replacing the Valves
Check for leaks
The repair manual has no test procedure of its own, so restart and prime the sprayer as the operation manual describes. Its pre-start rules still apply: never run a faulty unit, check the pressure rating of the hose and gun, and check every connection for leaks. Pay attention to the three places you disturbed: the pusher, the inlet housing and the outlet valve.
Confirm pressure and suction
A worn inlet valve shows as lost performance and poor or no suction, so a good repair should leave the pump drawing material readily again. If it still struggles to pull material or hold pressure, go back through the filter and tip checks above, then call (713) 931-0006 before ordering more parts.
Mistakes to Avoid When Replacing the PowrLiner 3500 Valves
- Leaving brush bristles on the inlet valve seat. The manual singles this out.
- Forgetting one of the two black seals: one goes in the housing, the other down inside the paint section.
- Swinging hard on the 30 mm wrench. Three light hammer blows is Titan's method for about 90 Nm.
- Fitting the spring support ring, outlet seat or seal in the wrong position. Check the figure before torquing to 60 Nm.
- Cleaning parts with halogenated hydrocarbon solvents such as bleach, mildewcide, methylene chloride or trichloroethane. The manual says they are not compatible with aluminum.
- Replacing or adjusting the pressure control valve yourself.
Order the PowrLiner 3500 Pump Parts
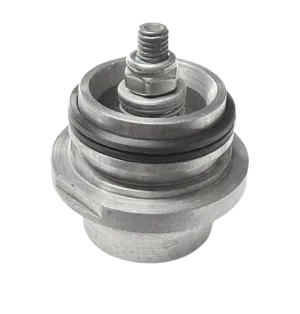
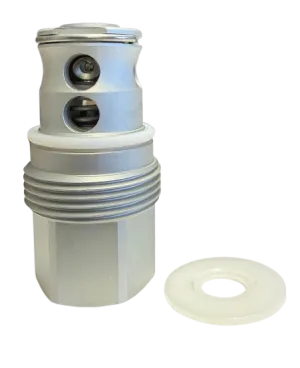
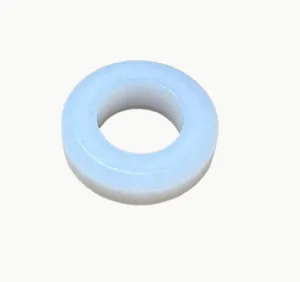
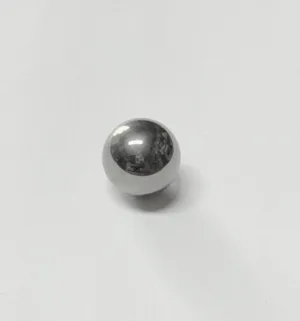
The 2393043 inlet valve, 2369452 pusher, wiper, O-ring and 2369458 seal are on the inlet valve body page; the outlet valve assembly, 341327 seat, 9941501 ball, spring, seal and O-ring are on the outlet valve page. Not sure which 3500 you own? Our guide to the PowrLiner 3500 variants helps you tell them apart. Gas striper owners with a PowrLiner 850 will find its pump procedure in our 850 repacking guide, and the full list is under all repair guides.
PowrLiner 3500 and 3500S valve parts:
 −8%
−8%
 −8%
−8%


Inlet valve 2393043, inlet housing, clip, pusher, wiper, O-ring and seal.
Outlet valve assembly, seat, ball, compression spring, support ring, seal and O-ring.
Front cover, regulator assembly, pressure control knob and relief valve parts.
The filter to check before you open the valves.
Not sure which PowrLiner 3500 valve part you need?
Call (713) 931-0006 with your model and serial number and we will match the valve parts to your sprayer before you order.
(713) 931-0006Order by Parts Diagram