
Most airless pattern faults come from a short list: a worn tip, a clogged filter or inlet screen, a pressure setting that is too low, a tip too large for the pump, or gun technique. Check the filters and screens first because they are the quickest check, then the tip, then pressure and technique. Always relieve pressure before touching the tip or a filter.
What a good pattern looks like
A good airless pattern is an even fan with soft edges and no heavy lines on the sides. Titan's Impact 440 manual has you find that by spraying on cardboard with the pressure at its lowest working setting, so test there rather than on the wall.
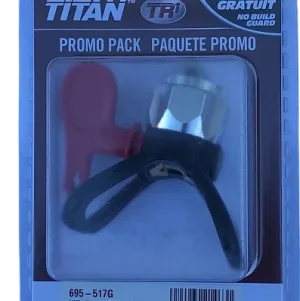
The tip number tells you what fan to expect. The first digit times two is the approximate fan width in inches, measured 12 in. from the surface. The last two digits are the orifice in thousandths of an inch. A 517 tip gives a 10 in. fan from a 0.017 in. orifice, so a pattern much narrower or wider than the number says is a symptom too.
Tails and hourglass patterns
Tails are heavy lines at the edges of the fan, and an hourglass pattern is heavy at the edges and thin in the middle. Titan's Hydra M manual ties both to inadequate delivery or a worn tip. That gives you three things to separate: the pressure setting, the supply of paint to the gun, and the tip.
- Check the paint supply and filters. A blocked screen or filter starves the tip (next section).
- Raise the pressure control slowly while you spray cardboard, and stop when the tails disappear. Titan's guidance is to use only as much pressure as it takes to atomize the coating. If you need far more than before, move on.
- Inspect the tip. A worn tip has a wider orifice, so pressure falls and the pattern gets coarse or streaky, and it uses more paint. Replace the tip when the pattern degrades.
Do not use pressure to cover for a worn tip: the lowest pressure that atomizes is the target, and the cardboard test above is how you find it.
Check the filters and screens first
Filters are the quickest thing to check, so they come first. Titan's Impact 440 Series manual says a soiled high-pressure filter can cause a poor pattern or a clogged tip. Airless systems usually have three places to look:
- Inlet screen on the suction tube. Titan says to check it each time you change containers. The 710-046 is one listed on the site.
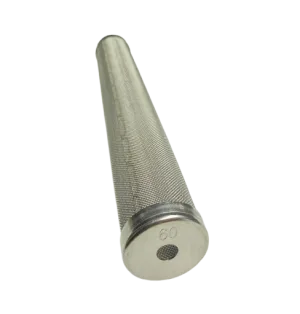
- Pump or manifold filter. Clean it regularly; the 730-067 is a 60 mesh manifold filter, with finer and coarser versions on the filters page.
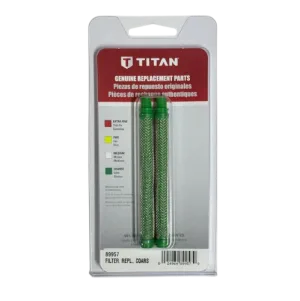
- Gun filter. Titan says to clean it after every use. The 0089957 is a coarse (green) 2-pack.
Titan's manuals say to check the gun screen and the pump outlet filter daily, and to clean the filter every use, more often with thick material. The mesh has to suit the coating, so a filter that is right for latex may not be right for another material. The filters page lists what Titan sells, and the Impact 400 manual notes that its filter and gun filter threads are left-handed, so check your manual before you force one.
Technique faults
If the pattern is fine on cardboard and wrong on the wall, the cause is how the gun moves. Titan's manuals give the rules:
- Keep the gun square (perpendicular) to the surface at a steady speed.
- Do not arc or flex your wrist; both change the distance during the stroke.
- Start moving before you pull the trigger.
- Lap each stroke about 50%.
Distance is manual-dependent. The Impact 440 and Impact 640 manuals say 12 to 14 in. (30 to 35 cm), while the Impact 400 and Hydra X manuals say 10 to 12 in. (25 to 30 cm). Use the range in your manual. If a new tip does not change the result on the wall, look at speed, distance and arcing before you buy anything else.
Tip and coating mismatch
A pattern can be poor even with a new tip if the tip does not suit the sprayer or the coating. Titan's troubleshooting pages list a tip too large for the pump as a cause of a poor pattern. Compare the tip's size with your sprayer's maximum tip, which is 0.023 in. on an Impact X 440 and 0.017 in. on the ControlMax 1700.
Wagner points smaller tips like the 311 at transparent stains, and solid paints and primers at 515, 517 or 619, so a stain tip on thick paint, or the reverse, gives a poor pattern. Titan's blog example is a 0.017 in. tip for exterior house paint and interior wall paint. Read the coating's data sheet, and see the airless spray tips page for options.
Quick symptom table
Pattern symptom, likely cause and what to open
| Symptom | Likely cause | First check | Where to look |
|---|---|---|---|
| Tails or hourglass | Inadequate delivery or a worn tip | Filters and screen, then raise pressure slowly on cardboard | Filters, then tips |
| Streaky, coarse spray | Worn tip with a wider orifice | Compare with a new tip of the same number | Tips |
| Weak or thin fan | Clogged filter, screen or pressure set too low | Clean the inlet screen, pump and gun filters | Filters |
| Spitting | On Hydra X: air in the system, dirty gun, needle adjustment or damaged seat | Check the filters, then your manual's troubleshooting table | Seals |
| Lines that follow your stroke | Distance, speed or arcing | Re-check the distance range in your manual | Technique, not parts |
| Pattern poor on a new tip | Tip too large for the pump, or wrong tip for the coating | Compare tip size with your sprayer's maximum | Tips |
Spitting causes in this table come from the Hydra X manual. Other models may list different causes, so check your own.
If the checks above do not fix the pattern, call our parts team at (713) 931-0006 with the sprayer model, the tip number and what the pattern is doing. You can also open the parts diagram for your sprayer from the order by diagram page.
Tips, filters and seals that match the checks above:
 −16%
−16%

The Short Version
Check the inlet screen, pump filter and gun filter first, then the tip, then the pressure setting and your technique. Tails and an hourglass point to delivery or a worn tip. Relieve the pressure before you touch anything.
Pattern still not right?
Call (713) 931-0006 with your sprayer model and tip number and our parts team will help you find the filter, tip or seal to check.
(713) 931-0006Order by Parts Diagram