
Relieve pressure and unplug the Impact 440. Unscrew the filter housing by hand, slip the filter off its support spring, and inspect the filter and the seal; clean or replace each as needed. Slide the new or cleaned filter over the spring with the adapter on the spring's pin, push it into the pump block, then thread the housing back in hand-tight until it is fully seated.
- Signs the Manifold Filter Needs Replacing
- Choosing 30, 60 or 100 Mesh
- Tools and Parts for the Filter Change
- Pressure Relief and Power-Down Before Replacing the Impact 440 Pump Filter
- Replacing the Manifold Filter: Step by Step
- Test the Impact 440 After Replacing the Pump Filter
- Mistakes to Avoid When Replacing the Impact 440 Pump Filter
- Order the Impact 440 Filter Parts
The pump filter, which the site lists as a manifold filter, is one of three screens Titan's troubleshooting chart names, alongside the inlet screen and the gun filter. On the Impact 440 it sits in the pump block under a housing you turn by hand, so the job needs no tools. The steps below follow the pump filter section of Titan's Impact 640 service manual; the Impact 440 fluid section diagram shows the same filter parts, so check your own manual alongside.
Signs the Manifold Filter Needs Replacing
Symptoms that point to the filter
- The sprayer will not prime. Titan's troubleshooting chart lists a clogged pump filter or inlet screen as a cause, with cleaning as the fix.
- Pressure will not build or hold. The chart names the pump filter, the gun filter and the inlet screen together.
- A poor spray pattern that a new tip and a pressure adjustment do not cure. The chart's advice is to clean all screens and filters.
- Pulsing or spitting at the gun. Partly blocked filters cause pressure loss, pulsing and spitting on airless sprayers in general.
Clean it first: when cleaning is enough
Titan's own instruction is to inspect the filter and then clean or replace it based on what you see, and every pump filter fix in the troubleshooting chart starts with cleaning. Wash it in the solvent that suits the paint, which the manual gives as water for latex and mineral spirits for oil-based. A screen that comes clean and is undamaged can go back in. Fit a new one when the mesh is damaged or will not come clean. The cleanup section asks for the sprayer, hose and gun to be cleaned after daily use, which is what keeps filters from clogging. Our article on cleaning the inlet screen, pump filter and gun filter covers all three.
Choosing 30, 60 or 100 Mesh
The Impact 440 owner's manual lists one spray filter in its specifications: 60 mesh, part number 730-067, and that is the filter shown at callout 26 on the 440 fluid section diagram. The higher the mesh number, the finer the screen. The site also sells two other grades under the same base number, the 730-067-10 100 mesh fine filter and the 730-067-30 coarse filter. Their product pages list several other Impact models, but the Impact 440 diagram shows only the 60 mesh, so call us with your serial number before you switch grades.
The Impact 440 and 640 manuals do not give a chart of mesh by coating. The general rule is to use the mesh that suits the material, and the coating maker's data sheet is the place to check. The gun filter is a separate part with its own grades; our article on 30, 60, 100 and 150 mesh gun filters explains those.
Tools and Parts for the Filter Change
Filter parts on the Impact 440 diagram
No tools are needed: Titan's procedure loosens and tightens the housing by hand. Have the replacement filter ready, the right solvent for cleaning, and eye protection, which the service manual asks for whenever you work on the sprayer.
Pressure Relief and Power-Down Before Replacing the Impact 440 Pump Filter
The filter housing threads into the pump block, so treat it like any fitting on a pressurized system and never loosen it on a sprayer that has just been running. Follow the Pressure Relief Procedure in the Impact 440 manual: lock the gun, turn the switch OFF and the knob counterclockwise to OFF, release the trigger lock, ground the gun against a metal container and trigger it until the hose is empty, lock it again, and set the PRIME/SPRAY valve to PRIME. Then unplug the cord. Our Impact pressure relief and injection safety basics explain the reasons.
Replacing the Manifold Filter: Step by Step
Step 1: Relieve pressure and unplug
Run the complete Pressure Relief Procedure and unplug the sprayer. Unlike the valve and packing jobs, the filter procedure does not ask you to remove the front cover.
Step 2: Unscrew the filter housing
Loosen the filter housing by hand and unscrew it from the pump block.
Step 3: Remove the filter from the manifold
Slip the filter off the filter support spring.
Step 4: Check the filter and seal
Inspect the filter and clean or replace it. Inspect the seal the same way and clean or replace it. The support spring and adapter are separate parts on the diagram if either is damaged.
Step 5: Fit the new filter and tighten the housing
Slide the new or cleaned filter over the support spring with the adapter seated over the pin on the spring, then push the filter into the center of the pump block. Slide the housing over the filter and thread it into the pump block hand-tight, making sure it is seated fully.
Test the Impact 440 After Replacing the Pump Filter
Prime the sprayer with solvent: siphon tube in water or mineral spirits, return hose in a metal waste container, knob at MIN and the valve in PRIME. Then move to SPRAY, flush through the grounded gun with no tip fitted, lock the gun and raise the pressure slowly while you watch the filter housing. If it leaks, relieve pressure before you touch it, then check that it is seated fully. With paint loaded, fit the guard and tip and test on cardboard. On the 440, solid green on the pressure indicator means 1901 to 3300 PSI. If priming or pressure is still poor with a clean filter, the inlet screen, the siphon connection and the inlet valve are the next checks.
Mistakes to Avoid When Replacing the Impact 440 Pump Filter
- Opening the housing under pressure. Relieve pressure and unplug first, every time.
- A housing that is snug but not seated. Titan wants it hand-tight and fully seated in the pump block.
- Leaving the adapter off the spring's pin. It goes over the pin before the filter is pushed into the block.
- Refitting a damaged seal. The procedure has you inspect it and clean or replace it.
- Cleaning only one filter. The chart lists the pump filter, gun filter and inlet screen together.
- Switching mesh without checking fitment. The 440 diagram lists only the 60 mesh 730-067.
Order the Impact 440 Filter Parts
Callouts 25 to 30 on the Impact 440 fluid section diagram cover the filter group: the 730-067 60 mesh filter, the 704-252 filter housing, the 757-105 support spring and the adapter, spring and O-ring around them. Gun filters are on the Impact 440 accessories page, and the inlet screen filter is on the suction set page. For filter types in general, read airless paint sprayer filters: types and uses. Pressure still low? See the outlet valve or packing guides, or all repair guides.
Pump filter parts for the Impact 440:
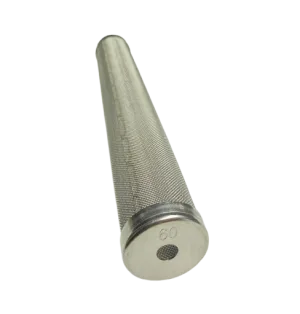
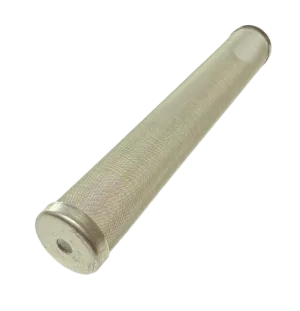
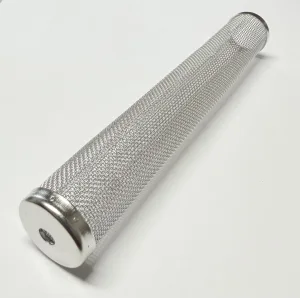
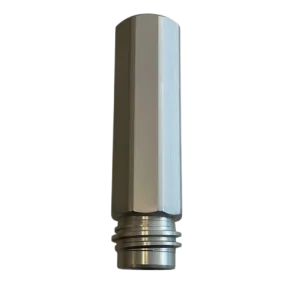
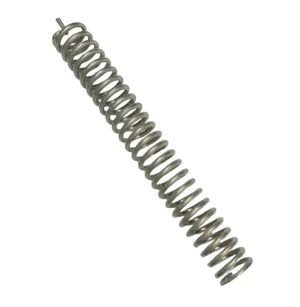
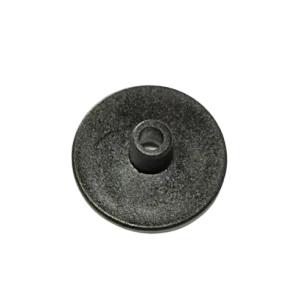
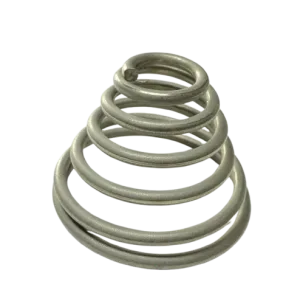

Manifold filter, housing, springs, adapter and O-ring at callouts 25-30.
Gun filters, Piston Lube, Liquid Shield and the valve kits.
Inlet screen filter, return tube and suction set parts.
Not Sure Which Impact 440 Filter Fits?
Send us your Impact 440 serial number and we will confirm the filter, housing or spring number on your diagram before you order.
(713) 931-0006Order by Parts Diagram