
On an Impact 1040 the fluid section sits in a clamp on the gear housing, held by a retainer and two nuts under the sprayer. Remove the foot valve and lower housing, unclamp and slide the section out, pull and inspect the rod, then fit greased upper packing 800-353A lip-down with the spacer and seal retainer at 25-30 ft. lbs. and the pre-formed lower packing 800-355A. Re-clamp at 100-130 in-lbs. The repacking kit is 0558740.
The Impact 1040 holds its fluid section differently from the smaller Impact pumps. Where the 840 screws its pump into the gear box housing behind a knock-off nut (see the Impact 840 repack), the 1040 sets it in a clamp on the gear housing and locks it with a retainer and two nuts underneath the sprayer. That changes the first and last stages of a packing job. Everything below comes from Titan's Impact 1040 service manual, pages 9 to 11.
Signs the Impact 1040 Packings Are Worn
Symptoms that point to the packings
- A leak at the top end of the fluid section. The 1040 troubleshooting table gives two causes: a worn upper packing and a worn piston rod.
- Pressure that sags or never builds once the simple causes are cleared. The table's internal fluid section leak entry covers worn or dirty packings as well as worn valve balls.
Rule out the valves and filters first
Before the pump comes apart, work down the table's cheaper suspects for weak pressure: a tip that is worn or too large, the knob not turned up far enough, a plugged pump filter, gun filter or inlet screen, the PRIME/SPRAY valve passing material to the return hose in SPRAY, an air leak at the siphon tube joint, or a fitting leaking outside. The filters are covered in our Impact 1040 filter assembly article. Worn valve seats can be cleaned, flipped or renewed through the valve service, which reaches them without touching the packings.
Impact 1040 Packing Parts and Tools
Upper packing assembly, lower packing assembly and piston rod
Our Impact 1040 parts guide shows where these sit among the other wear parts in the pump.
Tools and supplies
- Wrenches for the foot valve housing, the upper seal retainer and the two clamp nuts, plus a second wrench to hold the upper housing flats against the lower housing.
- A torque wrench that covers both specs in this job: 25-30 ft. lbs. on the upper seal retainer and 100-130 in-lbs on the clamp nuts.
- A bench vise for the upper housing, gripped only on its wrench flats.
- Grease for the packing lips, the packings' outer o-rings, the Viton o-rings and the PTFE back-up rings.
- The lower packing insertion tool from the fluid section parts list, and PTFE tape for the down tube/siphon tube adapter.
Pressure Relief and Power-Down on the Impact 1040
The 1040 manual puts a warning ahead of its fluid section work: follow the Pressure Relief Procedure, heed the injection, moving-parts and shock warnings, and always unplug before servicing. The relief procedure on page 6 runs: gun trigger locked, sprayer switched OFF, pressure knob turned counterclockwise into its OFF position in the black zone, trigger lock released, gun held against a grounded metal container and triggered to empty the hose, gun locked again, PRIME/SPRAY valve moved down to PRIME. A stopped motor does not mean the pressure is gone. Our Impact pressure relief basics article has more.
Replacing the 1040 Packings: Step by Step
One gap in the manual is worth knowing. Its preparation list does not spell out removing the front cover or the hoses, yet the reassembly refits the high-pressure hose, the siphon tube, the return hose and the front cover, so those have to come off at the start.
Step 1: Relieve pressure and unplug
Run the Pressure Relief Procedure and pull the plug. Then free the parts the reassembly later refits: the front cover, the return hose in its clamp on the siphon tube, the siphon tube/siphon set at the foot valve, and the high-pressure hose at the nipple on the back of the upper housing.
Step 2: Remove the fluid section
Unscrew the foot valve housing from the lower housing. Grip the upper housing's wrench flats with one wrench and break the lower housing free with another; the outlet valve stays on the rod. Under the sprayer, take off the two nuts and washers and lift away the fluid section retainer, which unclamps the section so it slides forward out of the gear housing.
Step 3: Withdraw the piston rod
Stand the upper housing in the vise, gripping the wrench flats lightly, since overtightening can damage it. Unscrew the upper seal retainer, slide the rod forward until the piston leaves the T-slot on the slider assembly, and pull the piston out through the bottom of the housing.
Step 4: Inspect the piston rod
Check the rod for wear before anything new goes in, and replace it if it is worn. A scored rod destroys new packings.
Step 5: Remove the upper and lower packing assemblies
Work both old packings out of the upper housing without scratching or scoring the bore. Clean the housing, look it over for damage, and replace it if needed.
Step 6: Fit the new packings
Fill the space between the lips of both new packings with grease and grease the o-rings on their outside. Set the upper packing into the top of the housing raised lip down, lay the spacer on it, and torque the upper seal retainer to 25-30 ft. lbs. Pre-form the lower packing with the sizing tool, start it into the bottom with the side carrying the o-ring closest to its face uppermost, and seat it with the lower packing insertion tool.
Step 7: Insert the rod and re-clamp the fluid section
Cap the rod with the piston insertion tool, push it in from below through the lower packing, the upper packing and the seal retainer, and take the tool off. Set the upper housing back in the fluid section clamp with the rod top engaged in the T-slot, lay the fluid section block over it, refit the washers and nuts and torque them to 100-130 in-lbs.
Step 8: Reconnect and prime
With the Viton o-ring and PTFE back-up ring greased and in place, thread the lower housing into the upper housing and tighten it with two wrenches. Connect the high-pressure hose to the nipple without a kink, then the foot valve (seals greased), the siphon tube/siphon set with PTFE tape on the adapter threads, the return hose clamp and the front cover. Start the sprayer per the Operation section and look for leaks.
Test the Impact 1040 After Repacking
Titan's last step is to start the sprayer as the Operation section describes and check for leaks. The general service notes add a rule for any repair: test it before regular work, and if the sprayer still is not right, go back over the procedure and then the troubleshooting table. With the unit running, confirm:
- No paint at the top of the upper housing around the rod.
- Dry joints between the upper and lower housing and at the foot valve.
- A tight hose connection at the nipple, with the hose clear of the cart frame.
- Pressure that builds and holds. If it does not, the valve seats and balls are the next suspects.
Mistakes to Avoid on a 1040 Packing Job
- Fitting the packings dry. The 1040 manual has you grease the lips and the outer o-rings first.
- Turning a packing the wrong way: the upper one goes in lip-down, the lower one with its face-side o-ring toward the top.
- Clamping the upper housing hard in the vise instead of lightly on the flats.
- Re-using a rod that shows wear.
- Confusing the torque figures: foot-pounds for the seal retainer, inch-pounds for the clamp nuts.
- Leaving the rod top out of the T-slot when the section goes back into the clamp.
Order the Impact 1040 Packing Parts
The Impact 1040 fluid section page carries every callout used here: the 800-353A upper packing assembly, the 800-355A lower packing assembly, the 805-456A piston rod and the 0558740 repacking kit. A 1040T is a different pump with its own pages and numbers, explained in Impact 1040T vs 1040. If the pump needs more than packings, the manual also covers swapping the complete fluid section. Other jobs are listed under all repair guides.
Packing parts for the Impact 1040:

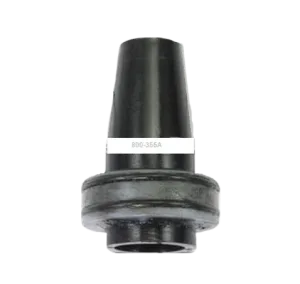
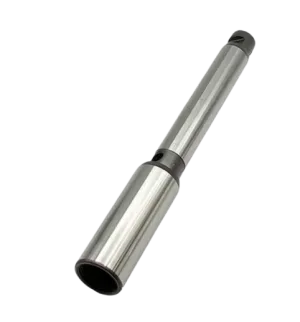
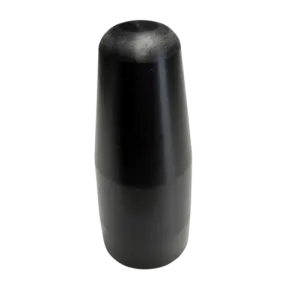
Packings, rod, spacer, housings, valves and kit 0558740.
Where the fluid section assembly sits on the sprayer, with the covers and hoses.
The repacking kit, piston insertion tool and lubricants.
Not sure it is a 1040 and not a 1040T?
Call (713) 931-0006 with the model and serial number and we will match the packings to your fluid section, or open the 1040 diagram and check the callouts.
(713) 931-0006Order by Parts Diagram