
Center the piston, relieve pressure, split the coupling, disconnect the hoses and lift the motor off the fluid section. Remove the three long bolts, cap and cylinder, then renew the rod seal block seals, piston head seals and single-use piston nut from the repair kit (2413196 on the diagram). Torque the piston into its new nut to the value you confirm, the long bolts to 85 ft.-lbs. and the mounting bolts to 45 ft.-lbs., then test-run and top off the oil.
The hydraulic motor on a Hydra X sits directly on top of the fluid section and drives it through a split coupling. Section 2.1 of Titan's Hydra X service manual rebuilds it for both the 4540 and the 7230, and it is the most exacting of the three jobs in that chapter: it must be done in a clean, dust-free area, every seal comes from a repair kit, and the piston is locked with a single-use nut at a high torque. Read the whole procedure before you start, and have the kit, a vise and a torque wrench ready.
Before You Open the Hydra X Hydraulic Motor
What the manual gives you to go on
The service manual explains how to rebuild the motor but includes no symptom chart for it, so this page will not guess at one. What it does define is the scope: the kit renews the O-ring, backup rings, wiper and rod seal in the rod seal block, and the wear ring, piston seal, backup rings, O-ring and piston nut on the piston head. Run through these checks before you commit:
- The fluid section is not the real problem. Leakage from the top packing or one stroke running faster than the other is the manual's trigger for fluid section service, a different job.
- You have the repair kit in hand; the diagram lists it as the 2413196 Hydraulic Motor Repair Kit.
- You have a clean, dust-free place to work. The manual warns that dust or metal particles left in the motor can damage its critical parts and shorten its service life.
- You have plugs or a clean rag for the hose ends, a bench vise, a rubber mallet and a torque wrench that reaches the values in the steps.
Rule out the cheaper causes first
Titan makes a fluid section test from the Operation Manual's Troubleshooting Guide the first step of pump service; our Hydra X pump problems article lists the symptoms it covers. Check the hydraulic fluid level and type too, using our hydraulic fluid article, and read how the Hydra X hydraulic drive works if the system is new to you.
Hydraulic Motor Repair Kit and Tools
What the repair kit renews
Tools and supplies
- Tools for the cover screws and the four motor mounting screws
- For the solenoid method: a bucket of water and a Torx or small Phillips screwdriver
- Plugs or a cleaning rag for the hydraulic hoses
- A hex wrench for the three long bolts, and a wrench for the flats of the piston
- Bench vise, rubber mallet and a torque wrench rated for the values in the steps
- Hydraulic oil for the cylinder bore and for topping off afterwards
Safety and Centering the Piston
Titan recommends starting with the piston in the middle of its stroke, and gives two ways to get it there. One of them runs the engine, so treat the order carefully: position the piston, shut the engine off, then release the pressure from the gun and hose, set the trigger lock and switch the unit off before you loosen anything, as the safety pages require. Turning off the engine alone does not release pressure; the bleed valve does. Our pressure relief article covers the procedure.
- Pull-start method (piston below the middle): remove the cover to expose the piston, turn the pressure control knob fully counterclockwise and then two turns clockwise, and gently pull the starter rope until the piston reaches mid-stroke. Each pull moves it upward.
- Solenoid-button method: remove the cover, submerge the fluid section and return tube in a bucket of water, turn the pressure knob fully counterclockwise and open the bleed valve fully counterclockwise. Start the engine, slide the throttle to a lower setting, press and hold the solenoid button with the screwdriver so the piston slides down, then ease off until it reaches the center and shut the engine off at once.
Rebuilding the Hydra X Hydraulic Motor: Step by Step
Step 1: Split the coupling
With the cover off, push the coupler sleeve upward past the resistance of the O-ring under it, slide that O-ring up clear of the two coupling halves, and lift the halves out. Slide the sleeve and O-ring back down over the fluid section piston.
Step 2: Disconnect the hoses and lift the motor off
Have plugs or a rag ready, because hydraulic fluid will leak, and pull both hydraulic hoses off their elbow fittings. Remove the four screws and washers from the bottom of the motor and lift the whole hydraulic motor off the fluid section.
Step 3: Open the cylinder
Unscrew the three long bolts from the top of the motor with a hex wrench. Twist the cylinder cap off the cylinder, pull the cylinder off the rod seal block, and draw the piston assembly out of the block.
Step 4: Renew the rod seal block seals
Take the O-ring and backup ring off the top of the block, then the wiper, backup ring and rod seal from inside it, without scratching any metal surface. Check the wear ring that stays in the block, and fit new seals from the kit.
Step 5: Rebuild the piston head
Clamp the piston nut in a bench vise, put a wrench on the flats of the piston and remove the nut, washer and piston head assembly. Strip the wear ring, piston seal and backup rings from the outside and the O-ring and backup rings from the inside, again without scratching metal, and replace them with kit parts. Refit the head and washer, clamp the new nut in the vise without marking it, thread the piston into it with the wrench on its flats, and torque the joint to the confirmed value (see the note below).
Step 6: Reassemble the cylinder
Tap the cylinder onto the rod seal block with a rubber mallet until flush and coat its bore with hydraulic oil. Insert the piston assembly through the cylinder into the block, stand the unit upside down with the piston on a hard surface, and tap the block until the piston seats. Tap the cylinder cap on flush, then run the three long bolts through cap and cylinder into the block at 85 ft.-lbs.
Step 7: Refit the motor and its hoses
Set the motor back over the fluid section and secure it with the four bolts and washers at 45 ft.-lbs. Reconnect each hydraulic hose to its own elbow fitting; they must not be swapped.
Step 8: Recouple and close up
Slide the coupler sleeve and O-ring up over the hydraulic motor piston and make sure the sleeve is fully seated. Refit the two coupling halves to join the two pistons, slide the O-ring down over them and the sleeve over the O-ring, then replace the cover and its screws.
Test Run and Hydraulic Oil Check
Run, stop, check the oil
Titan's closing instruction is short: start the engine, let the sprayer run for a few minutes, shut it down, and check the hydraulic oil level straight away, topping it off if needed. Some fluid escapes when the hoses come off, which is why that check matters.
Check for leaks
During the test run, look over the two hose connections and the joints you opened for weeping oil. Once the level is topped off, prime and spray as the operation manual describes.
Mistakes to Avoid When Servicing the Hydra X Hydraulic Motor
- Working in a dusty area or leaving any particles on parts before they go back in.
- Scratching the rod seal block or the piston head while you pick out the old seals.
- Reusing the piston nut, or crushing the new one in the vise jaws.
- Swapping the two hydraulic hoses on the elbow fittings.
- Fitting the coupling halves before the coupler sleeve is fully seated over the motor piston.
- Leaving the engine running after the solenoid method has centered the piston, or skipping the oil-level check after the test run.
Order the Hydra X Hydraulic Motor Repair Kit
The repair kit is on the Hydra X Motor / Pump Assembly diagram, next to the complete 2401635A fluid section the motor sits on. The hydraulic system diagram lists the 2401653A hydraulic tank and the filter breather. If the pump below the motor needs work too, continue with servicing the Hydra X fluid section; the drive belt has its own Hydra X belt guide, and the full list is under all repair guides.
Hydraulic motor and hydraulic system parts listed for the Hydra X 4540 and 7230:
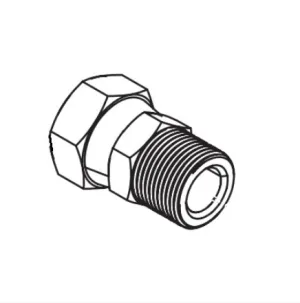
Hydraulic motor repair kit, fluid section and swivel fitting.
Hydraulic pump and valve assembly, tank, filter breather and gasket.
The pump the motor drives, with its service kits.
Confirm your Hydra X motor kit before you start
Call (713) 931-0006 with your Hydra X model and serial number, or open the Motor / Pump Assembly diagram to find the repair kit.
(713) 931-0006Order by Parts Diagram