
Test the pump first, then remove the siphon tube, the cover and the two coupling halves, loosen the locking nut and pull the fluid section off the hydraulic motor. Strip the foot valve, outlet valve and both packing sets, inspect the chrome and seats, and rebuild with every part in the service kit. Soak leather packings in hydraulic oil for 15-20 minutes, torque the outlet valve housing to 120 ft.-lbs., and give it 24 hours to cure before any fluid goes through.
- Signs the Hydra X Fluid Section Needs Service
- Hydra X Fluid Section Parts and Tools
- Pressure Relief Before You Open the Pump
- Servicing the Hydra X Fluid Section: Step by Step
- Test the Hydra X Pump After Service
- Mistakes to Avoid When Servicing the Hydra X Fluid Section
- Kits, Single Parts and the 4540/7230 Conversion
- Order Hydra X Fluid Section Parts
The Hydra X service manual gives one fluid section procedure for both the 4540 and the 7230. The steps match; the packing sets and kit numbers do not, so keep your model in mind whenever a part is named. One detail sets this job apart: the outlet valve housing is locked into the displacement rod with two threadlockers and needs a full day to cure, so plan around that wait.
Signs the Hydra X Fluid Section Needs Service
Symptoms that point to the fluid section
- Excessive leakage from the top packing. Titan lists this as a reason to service the pump early.
- Strokes that run faster in one direction than the other, the manual's second early-service trigger.
- About 1,000 hours of use since the last routine service, the interval the manual gives for this pump.
Rule out the cheaper causes first
The first instruction in Titan's disassembly procedure is to test the pump before you take anything apart, using the fluid section test in the Troubleshooting Guide of the Operation Manual. It is there to pin down the cause before you commit to a teardown. Our Hydra X pump problems article lists the symptoms from that guide, and the Hydra X maintenance schedule shows the daily checks, including the suction filter screen and the packing oil.
Hydra X Fluid Section Parts and Tools
Service kits and packings
Tools and supplies
- A bench vise to hold the displacement rod by its flats and the fluid section adapter upside down
- Wrenches for the outlet valve housing and for the flats of the cylinder
- A torque wrench that reads in ft.-lbs. and in.-lbs.
- Hydraulic oil to soak the leather packings and wet the other packing parts
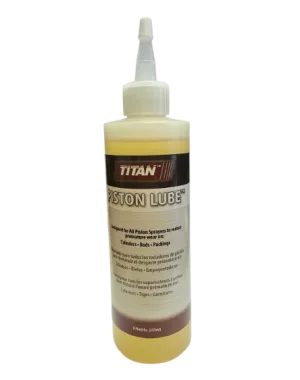
- Piston Lube for the o-rings, and blue Loctite 243
- The adhesive activator and yellow Loctite 330 the manual says come with repair kit 240713
Pressure Relief Before You Open the Pump
Titan's safety pages set the rule for any work on a Hydra X: release the pressure from the gun and hose, put the trigger lock on, and switch the unit off. Shutting the engine down does not do the first part for you; the PRIME/SPRAY or bleed valve must be turned to its relief position. Follow the pressure relief procedure in your operation manual, which our pressure relief article explains, and wear protective eyewear.
Servicing the Hydra X Fluid Section: Step by Step
Step 1: Test the pump and expose the coupling
Run the fluid section test from the Operation Manual first. Then take off the siphon tube assembly, remove the cover screws and lift away the cover so the coupler sleeve shows.
Step 2: Split the coupling
Push the coupler sleeve upward against the light resistance of the o-ring beneath it, then slide that o-ring up until it clears the two coupling halves. Lift both halves out.
Step 3: Drop the fluid section and strip the foot valve
Back the locking nut off completely and pull the whole fluid section away from the hydraulic motor. Unscrew the foot valve, take out its ball cage, ball, ball seat and PTFE o-ring, and remove the ball pin from the cage.
Step 4: Pull the rod and both packing sets
Push the displacement rod down as far as it goes and draw it out of the bottom of the cylinder; clamp its flats in the vise and wrench off the outlet valve housing to free the ball, retainer and lower packing set. Turn the fluid section adapter upside down in the vise, unscrew the cylinder by its flats, and take out the upper packing set, upper spring, spring retainer and the o-rings at both ends of the cylinder.
Step 5: Clean and inspect
Clean every part and check the chrome of the rod and cylinder for grooves, dents or worn areas; damaged hard chrome means replacement. Replace the inlet valve seat if it is cracked or worn and the outlet valve seat if it is damaged, then fit every part in your kit and any other parts as needed.
Step 6: Build the upper packings into the adapter
With the adapter still inverted, soak the leather packings for 15-20 minutes, wet the other parts with hydraulic oil, and insert the female gland, the V-packings and the male gland, peaks pointing down for now. Add the upper spring (small end toward the packings) and the spring retainer, fit new o-rings on the cylinder lubricated with Piston Lube, and thread the cylinder into the adapter, tightening it on its flats.
Step 7: Rebuild the outlet valve on the rod
Soak the lower leather packings the same way, then stack the gland, lower packing set, second gland and retainer onto the outlet valve housing with the V peaks facing down, and set the ball on the housing. Coat the rod's female threads with activator and the housing's male threads with 4 drops of yellow Loctite 330 and 4 drops of blue Loctite 243. Screw the housing into the rod and torque it to 120 ft.-lbs.
Step 8: Refit the rod, foot valve and coupling
Feed the rod up through the upper packings without scratching the cylinder or adapter walls until its end shows at the top, take the assembly out of the vise, and rebuild the foot valve (ball pin, two o-rings, seat, ball, cage, o-ring) before threading it into the cylinder at 250 in.-lbs. (plus or minus 75 in.-lbs.). Line the pump up under the pump block, tighten the locking nut onto the hydraulic motor, refit the coupling halves, slide the o-ring and then the coupler sleeve over them, and replace the front cover.
Test the Hydra X Pump After Service
Check for leaks
Once the cure time is up, top up the upper packing lubricant with Piston Lube, start and prime as the Operation Manual describes, and watch every joint you opened: foot valve, both cylinder ends, locking nut and top packing. Lubricant at the top packing is fine; coating leaking past it is not.
Confirm even strokes
Compare the speed of the up and down strokes. Uneven strokes were a reason to open the pump, so even ones are your proof it is fixed; if one direction still runs fast, repeat the Operation Manual's fluid section test.
Mistakes to Avoid When Servicing the Hydra X Fluid Section
- Pumping fluid through the section before the 24-hour cure is up.
- Using oil, water or solvent in place of Piston Lube as the upper packing lubricant.
- Scratching the cylinder or adapter bore while you push the displacement rod through.
- Fitting the upper set with its peaks pointing up while the adapter is still inverted.
- Forcing the foot valve or cylinder past full thread engagement.
- Leaving kit parts in the bag or fitting non-Titan parts; the manual says to use every part in the kit and original Titan service parts.
Kits, Single Parts and the 4540/7230 Conversion
Titan's instruction is to rebuild with every part in the kit and replace anything else as needed, so a kit is the starting point. The diagrams list minor, major and PTFE kits for each model; our Hydra X service kits article compares them. The manual's figure shows the 4540 sets with leather and PTFE V-packings and the 7230 sets in PTFE. A 4540 can also be converted to 7230 performance, or back, with a conversion assembly: 02424618 (4540 to 7230) or 2432905 (7230 to 4540).
Order Hydra X Fluid Section Parts
Work from the Hydra X 4540 fluid section diagram or the 7230 fluid section diagram, and pick up Piston Lube from the accessories page. With the fluid section off, the hydraulic motor above it is exposed; that job has its own guide, servicing the Hydra X hydraulic motor, and the drive belt is covered in the Hydra X belt guide. See all repair guides for the rest.
Service kits, packings and supplies listed for the Hydra X fluid sections:
4540 packings, glands, springs, seats and service kits.
7230 packings, ball cage, seats and service kits.
Complete fluid section and the hydraulic motor repair kit.
Piston Lube, Liquid Shield, guns, hoses and tips.
Not sure which Hydra X kit you need?
Call (713) 931-0006 with your Hydra X model and serial number, or open the 4540 or 7230 fluid section diagram and match the kit.
(713) 931-0006Order by Parts Diagram