
Relieve pressure first. Unclip the top of the trigger guard from the gun head, use the bottom of the guard as a wrench to unscrew the handle, pull the filter out and clean or replace it. Slide the filter back in tapered end first, thread the handle into the gun head, tighten it with the guard and snap the guard back on. Titan says to clean the filter after every use.
The RX-80's filter sits in the gun head under the handle assembly, and Titan's RX-80 manual gives a six-step procedure for it that needs no separate tools: the trigger guard is the wrench. The same page carries a filter chart that matches four filter grades to the coating you spray. Our RX-80 parts list does not show the filter, so this guide gives the part numbers from the chart and our filter pages.
When to Clean or Replace the RX-80 Gun Filter
Signs the filter needs attention
- The day's spraying is done. Titan says to clean the gun filter after every use. When the gun and its filter are not cleaned daily, material cakes and the gun stops performing as it should.
- Pressure drops, or the tip pulses or spits. A partly blocked filter is a common cause of all three on an airless system.
- You are switching coatings. The manual's chart assigns a different filter grade to latex, enamels, stains and filler paints, so the filter that suits one job may not suit the next.
Rule out the tip first
A clogged tip gives the same lost pattern as a clogged filter and takes seconds to check: turn the tip 180º so the handle arrow points backwards, trigger once to blow the clog out, and repeat if needed, but never pull more than once at a time in the reversed position. A worn tip spoils the pattern, slows production and wastes material, and Titan says to replace it immediately. If the gun drips or spits only when you let go of the trigger, the filter is not the cause; that symptom belongs to our RX-80 seal assembly guide. The pump has filters of its own too, covered in our guide to cleaning airless sprayer filters.
RX-80 Filter Grades and Tools
Filters Titan lists for the RX-80
Tools and supplies
- The gun's own trigger guard: its bottom end is the wrench for the handle
- A replacement filter in the grade the chart gives for your coating
- Water or a suitable solvent for cleaning the old filter, as the manual's cleanup section specifies
Pressure Relief Before You Open the Handle
The RX-80 manual forbids assembling, changing or cleaning the gun, tip or tip guard until the spray system has been depressurized with the "Pressure Relief Procedure" in your sprayer's owner's manual. The filter is part of the gun, so it falls under that rule. Lock the trigger first: viewed from the rear of the gun, the lock pushes left to right to lock and right to left to release. If your sprayer's manual is not to hand, find it on our manuals page, and read our article on the pressure relief procedure for the reasoning.
Changing the RX-80 Filter: Step by Step
Step 1: Relieve pressure and lock the trigger
Depressurize the sprayer by its owner's manual procedure and engage the RX-80 trigger lock.
Step 2: Unclip the trigger guard
Unclip the top of the trigger guard from the gun head.
Step 3: Unscrew the handle
Use the bottom of the trigger guard as a wrench to loosen the handle assembly, then unscrew it from the gun head.
Step 4: Pull the filter and clean or replace it
Pull the old filter out of the gun head. Clean it, or replace it with the grade your coating calls for.
Step 5: Insert the filter tapered end first
Slide the clean or new filter into the gun head with the tapered end leading.
Step 6: Refit the handle and guard
Thread the handle assembly back into the gun head, tighten it with the trigger guard, and snap the guard back onto the gun head.
Check the Gun After a Filter Change
Check for leaks
Leave the tip and guard off, start the sprayer and keep the pressure at its lowest setting, since the gun kicks hardest with no tip fitted. Brace the gun against a metal container, flush as your sprayer's manual describes, and confirm the handle joint and every fitting are tight and dry.
Confirm the spray pattern
Relieve pressure again, fit the tip guard and tip with the arrow pointing forward, and start spraying. Raise the pressure only until the spray is completely atomized; Titan's advice is to spray at the lowest pressure that gives the result you want and to fit a larger tip, not more pressure, when you need more coverage. If the pattern is still poor with a clean filter, look at the tip next.
Filter Mistakes to Avoid
- Sliding the filter in square end first. The tapered end goes into the gun head first.
- Letting a day's spraying go without cleaning the filter, so material cakes in it.
- Leaving the filter or gun sitting in water or solvent after cleaning.
- Running a grade that does not match the coating, such as an extra-fine filter with filler paints.
- Flushing with the tip off at anything above the lowest pressure.
- Washing parts in materials containing bleach or chlorine, which Titan says are not compatible with aluminum.
Order RX-80 Gun Filters
The yellow 0089959 and green 0089957 are on our unthreaded gun filter page; the white 0089958B and red 0089960 complete the chart, and all four are below. For how mesh grades compare across Titan guns, see our gun filter mesh guide. Other gun and pump procedures are listed under all repair guides.
The four RX-80 filter grades from Titan's chart:
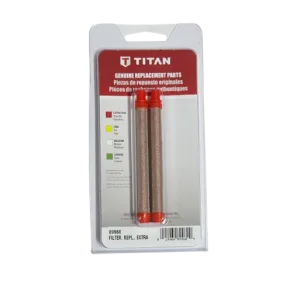
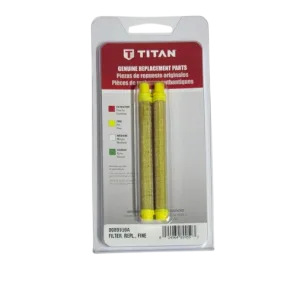
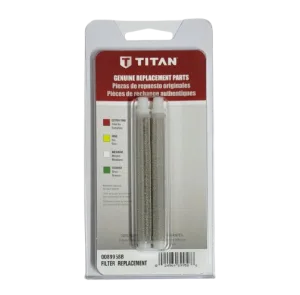
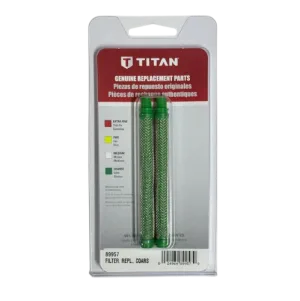
Unthreaded gun filters, including the yellow 0089959 and the green 0089957.
Seal assembly, diffuser, trigger, handle seal and the rest of the gun.
Complete RX-80 guns, gun and hose kits and the gun repair kit.
Not sure which RX-80 filter you need?
Call (713) 931-0006 and tell us the gun and the coating, and we will match the filter grade before you order.
(713) 931-0006Order by Parts Diagram