
Rebuilding the S-3 spray gun follows a simple order: relieve pressure, remove the trigger, inspect and replace the diffuser, replace the packing seal assembly, reassemble and test. This walkthrough names the parts involved from the S-3 parts list. Most available items are processed for shipment within about 1-2 business days, though some are ordered from the manufacturer after you order (see Shipping Info).
Before You Start
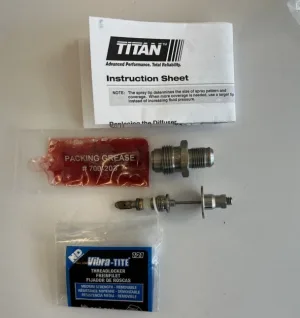
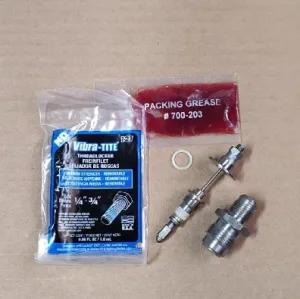
Gather the repair kit, hand tools and a clean work surface before you begin. Confirm the kit matches your S-3 spray gun by checking the part numbers on the S-3 parts list: that page shows gun repair kit 550-276, and the S-3 accessories page lists 550-275. Ordering the wrong kit is an easy mistake to avoid by matching the number to the diagram first.
This page is an overview, not a replacement for the manual. Torque values, exact disassembly order and safety warnings for your gun are in the manual on the manuals page. Airless guns work at very high fluid pressure, and a jet of fluid can inject through the skin. If that ever happens, treat it as a medical emergency and get immediate medical attention.
Step 1: Relieve Pressure
Switch the sprayer off and follow the pressure relief procedure in your sprayer's manual before any service. Never work on the gun while the system is under pressure, and engage the gun's trigger lock while you prepare the work area.
Step 2: Remove the Trigger Assembly
The trigger assembly is part 0502074 (callout 4) on the diagram, held by the trigger screws: the short trigger screw 580-513 (callout 15) and the long trigger screw 0502068 (callout 2). Remove them and set each part aside in the order it came off so you have a clear reference during reassembly.
Step 3: Inspect the Diffuser
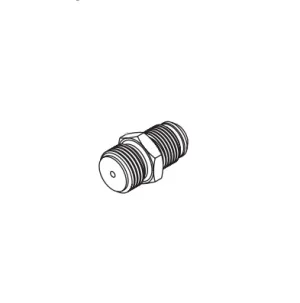
The S-3 uses the one-hole diffuser 550-277 (callout 6) with the diffuser o-ring 0502080 (callout 3). Look for wear, damage or buildup. The repair kit includes a 7/8 inch diffuser and a diffuser o-ring, so a worn diffuser is a natural part to replace while the gun is apart.
Step 4: Replace the Seal Assembly
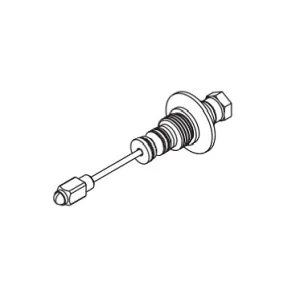
The packing seal assembly is 550-264 (callout 13), and the packing spring is 0502054 (callout 12). Remove the old assembly, inspect the surfaces it seats against for scoring or damage, then fit the new one so it seats fully and evenly. The repair kit also supplies packing grease and thread locker for this stage.
Step 5: Reassemble
Work back through the parts in reverse order. Check the end cap 0502159 (callout 11), the handle seal 560-038 (callout 16) and the tip seal 651-020 (callout 7) while you are in there, and replace any that are worn. Confirm the trigger moves freely and returns before moving on.
Step 6: Test Before Full Use
Reconnect the gun, keep the tip guard fitted and check for leaks at the tip and the fittings with a short test on scrap material. A seal seated crooked or a loose screw is a quick fix now and a nuisance mid-job.


Common Installation Mistakes
- Skipping the pressure relief step, which risks both injury and component damage during disassembly.
- Ordering from memory instead of matching the kit number to the S-3 diagram.
- Not inspecting the seating surfaces before installing a new packing seal assembly, which can mean a repeat leak after the repair.
- Skipping the test and discovering an installation issue mid-job instead of before returning to work.
Tools and Parts Checklist
Before starting, lay out the repair kit, a screwdriver or wrench that fits your trigger screws, a clean rag, and a small container to keep removed hardware organized. Having everything within reach prevents the job from stalling while you hunt for a missing tool. If the diagram shows other worn parts, such as the trigger guard 0296504 or the gun head 0502077, add them to the same order.
After the Install: What to Watch For
In the first few jobs after a rebuild, pay closer attention to the gun than usual. A slight weep at a fitting or an unusual trigger feel is far easier to correct early than after it has had time to cause secondary wear elsewhere in the gun. For routine care, see our guide to cleaning an airless spray gun after every job, and for which diagram and kit fit the S-3, S-5 and S-7, read S-3, S-5 and S-7 Gun Parts.
How to Order S-3 Repair Parts
AllTitanParts.com supplies genuine OEM parts for Titan, SpeeFlo, SprayTech and Wagner and is based in Houston, Texas. Orders are processed on business days with a 12 pm Eastern cut-off. Most available items are processed for shipment within about 1-2 business days; some items are ordered from the manufacturer after you order, so availability shown does not always mean an item is on a shelf. Delivery dates are estimates; see Shipping Info for delivery and special-order details. Call (713) 931-0006 if you are unsure which repair kit matches your gun.
Get the Right S-3 Repair Kit
Confirm your exact gun configuration with us before you order, so the kit you receive is the kit you need.
(713) 931-0006 Shop S-3 Parts